
Why Using Alcohol for Dogs Ears Can Do More Harm Than Good
Using alcohol for dogs ears is one of the most common DIY cleaning mistakes pet owners make, and it can cause real pain before you even realize something is wrong.
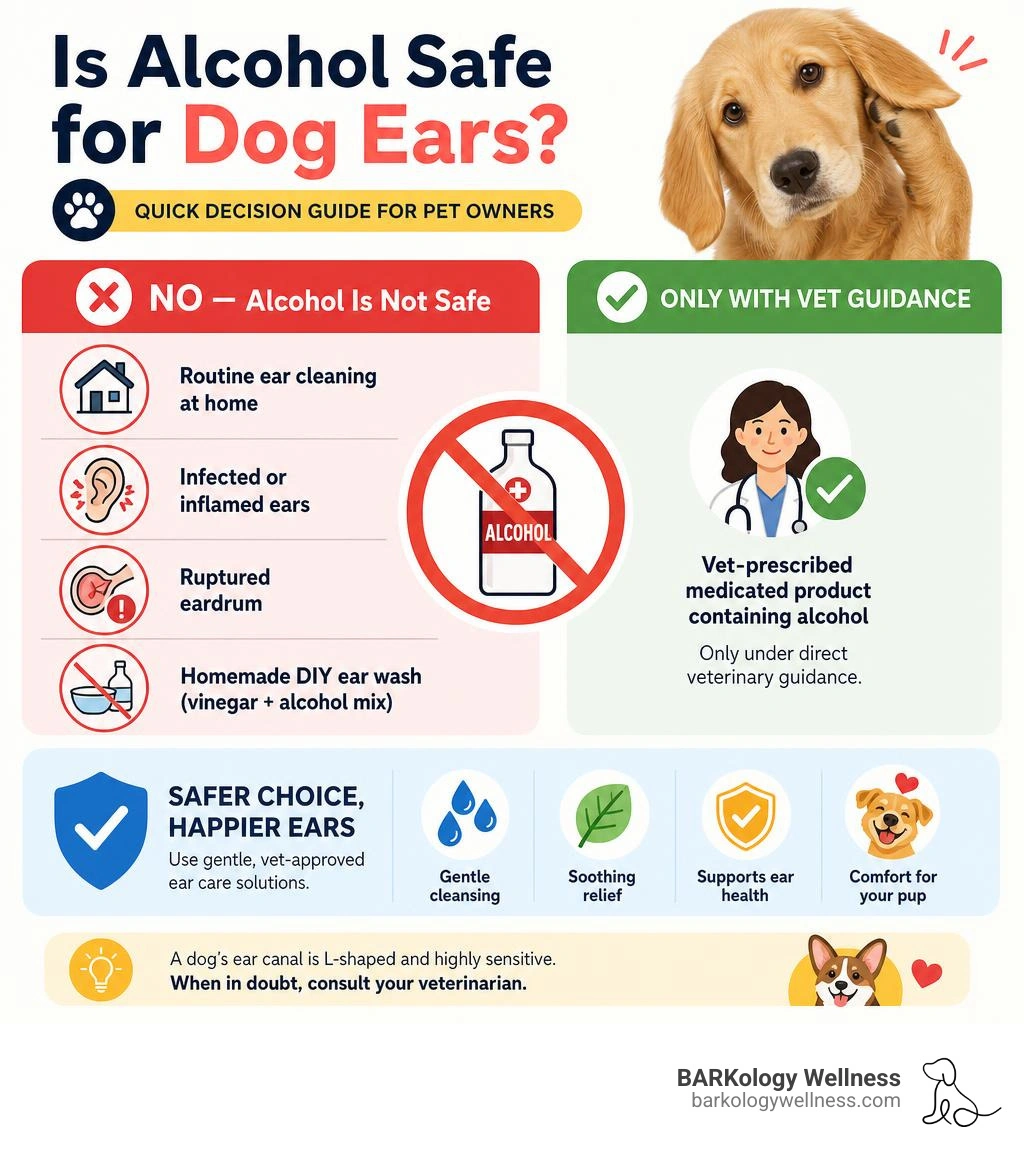
Quick answer: Is alcohol safe to use in a dog's ears?
| Situation | Is Alcohol Safe? |
|---|---|
| Routine ear cleaning at home | No, causes irritation and stinging |
| Infected or inflamed ears | No, worsens damage |
| Ruptured eardrum | No, risk of permanent hearing loss |
| Vet-prescribed medicated product containing alcohol | Only under direct veterinary guidance |
| Homemade DIY ear wash (vinegar + alcohol mix) | Not recommended |
A dog's ear canal is L-shaped and highly sensitive. Even small amounts of rubbing alcohol can cause nearly unbearable stinging, especially if the skin inside is already raw, scratched, or inflamed. What feels like a quick fix can actually delay proper treatment and make infections worse.
Many well-meaning owners reach for household products because they seem convenient. But the ear canal is not a forgiving place for experimentation.
This guide breaks down exactly what's safe, what's not, and how to clean your dog's ears without causing harm.
I'm Nabilah Shamseddine, franchise entrepreneur and leader at BARKology Wellness, where premium, health-first pet care is the standard, and that includes knowing which ingredients like alcohol for dogs ears belong nowhere near your pup's ear canal. Having worked hands-on with wellness-focused pet care at scale, I've seen how the wrong home remedy can turn a simple cleaning routine into a vet visit.
Quick alcohol for dogs ears definitions:
Is Alcohol for Dogs Ears Safe, or Too Harsh?
For routine at-home ear cleaning, alcohol is usually too harsh for dogs.
Rubbing alcohol is a strong drying agent. That may sound helpful if your dog just had a bath or swim, but the problem is that dog ears are delicate. Alcohol can strip moisture from already-sensitive tissue, intensify inflammation, and sting raw skin. If your dog has scratched the ear, has yeast irritation, or has a bacterial infection brewing, alcohol can turn a mildly uncomfortable ear into a “nope, don’t touch me” situation very quickly.
The bigger concern is what we cannot see from the outside: the eardrum. If the eardrum is damaged or ruptured, harsh substances can reach areas they should never reach. That raises the risk of ototoxicity, which means injury to the structures involved in hearing and balance.
Some veterinary products do contain alcohol-type ingredients. For example, an official label for an alcohol-based veterinary ear cleanser lists SD alcohol along with acids used for cleansing and drying. But that does not mean rubbing alcohol from the medicine cabinet is safe. Product labels include specific directions, warnings, and use limits. They also tell pet parents to stop use and consult a veterinarian if irritation develops.
That is a very different situation from mixing up a homemade ear wash in the kitchen and hoping your dog’s ear canal approves. Spoiler: it often does not.
Why Alcohol for Dogs Ears Can Sting
Alcohol stings because it rapidly evaporates and pulls moisture from tissue. On intact, healthy skin, that may feel cold or sharp. On irritated tissue, it can burn.
Dog ears commonly become irritated before owners notice obvious symptoms. A dog may scratch the ear with a back paw, rub against furniture, or shake their head hard enough to create tiny abrasions. Add alcohol to those micro-injuries and you have a recipe for pain.
Alcohol can be especially uncomfortable when the ear canal is affected by:
- Yeast overgrowth
- Bacterial infection
- Allergy-related inflammation
- Scratches or open sores
- Excessive wax trapping debris
- Red, swollen skin
- Moisture after swimming or bathing
If your dog suddenly yelps, jerks away, pins the ear back, or starts frantically shaking after a cleaner is applied, stop. That is not “the cleaner working.” That is your dog telling you something hurts.
When Alcohol-Based Ear Products May Appear on Labels
You may see ingredients such as SD alcohol, ethanol, or benzyl alcohol on certain medicated or drying ear products. These are usually formulated products, not DIY mixtures.
Alcohol-containing products may be used in veterinary care for specific reasons, such as:
- Drying the external ear canal
- Helping dissolve oily debris
- Supporting medicated formulas
- Preparing the ear for treatment
- Managing ears under veterinary supervision
But the key phrase is “under veterinary supervision.”
Medicated ear products are chosen based on what is happening in the ear. A veterinarian may check the ear canal, look for a ruptured eardrum, examine discharge under a microscope, and determine whether yeast, bacteria, mites, allergies, or another issue is involved.
If a product label says “topical use only,” “avoid contact with eyes,” “consult a veterinarian if irritation develops,” or “do not use with suspected eardrum damage,” take that seriously. Dog ears are not the place to freestyle.
Biggest Risks of DIY Alcohol Ear Washes
Homemade alcohol ear washes usually create more risk than reward.
Common DIY problems include:
- Wrong dilution: “A splash of this and a splash of that” is not a safe medical formula.
- Vinegar irritation: Vinegar can sting inflamed ears and may worsen irritation when used incorrectly.
- Over-drying: Alcohol can dry the canal too aggressively, damaging the skin barrier.
- Delayed vet care: Temporary drying may hide symptoms while infection gets worse.
- Moisture trapping: Poor technique can leave fluid behind in an already warm canal.
- Pain masking: Dogs may stop letting you touch the ear, making the problem harder to monitor.
- Eardrum uncertainty: You cannot confirm an intact eardrum at home.
- Hearing risk: Untreated ear infections can lead to chronic damage and hearing loss.
Ear infections do not reliably go away on their own. If infection is present, cleaning alone is not treatment. It is more like mopping around a leaking pipe while refusing to call the plumber.
Clean or Call the Vet? How to Read Your Dog’s Ears First
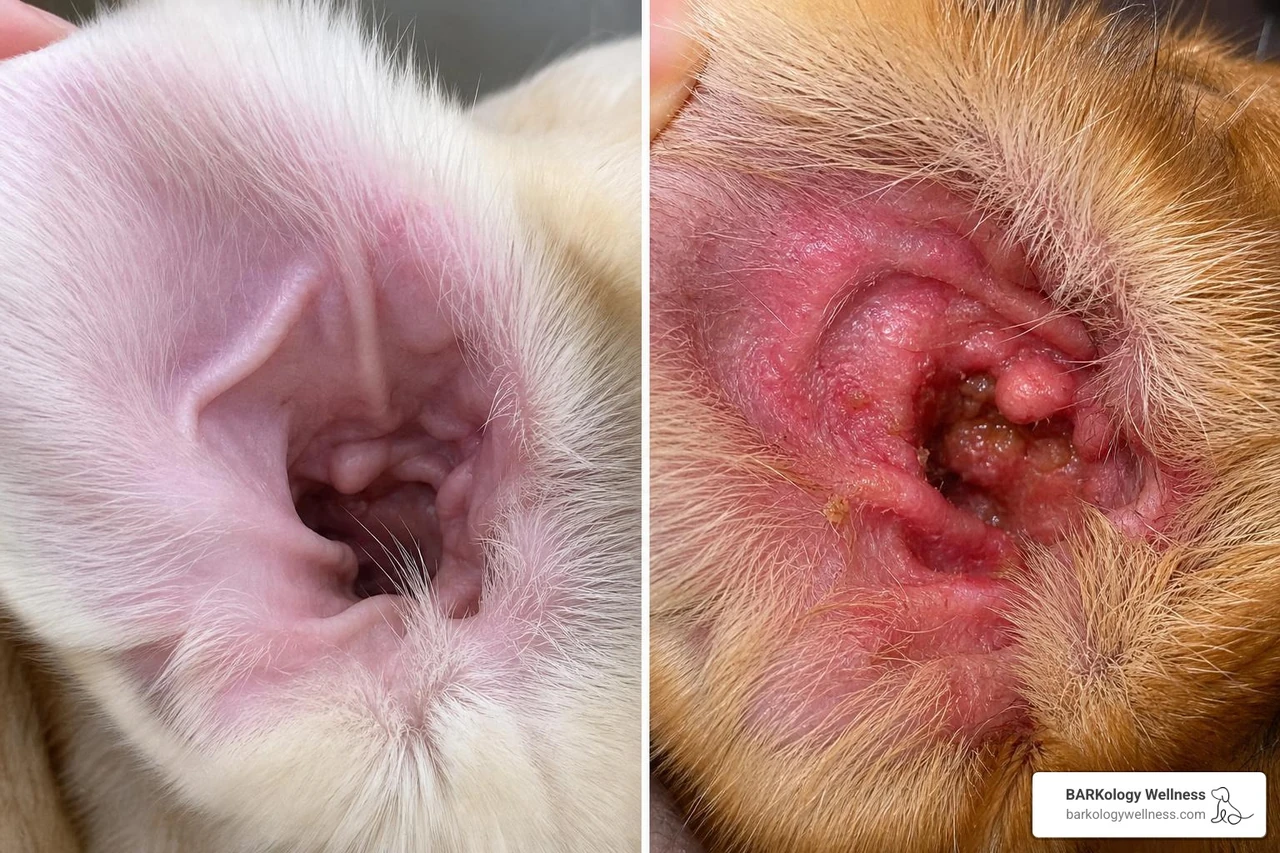
Before you reach for any cleaner, look first. A healthy dog ear is usually light pink, comfortable to touch, and free of strong odor. A small amount of pale yellow wax can be normal. Wax is part of the ear’s natural self-cleaning system.
What we do not want is redness, swelling, pain, foul smell, heavy discharge, blood, or sudden hearing changes. Those are not “dirty ear” signs. Those are “call the vet” signs.
If you are unsure whether the wax you are seeing is normal, we break it down further in our guide to bad ear wax in dogs.
Signs Your Dog’s Ears May Only Need Cleaning
Your dog’s ears may be reasonable to clean at home if you notice:
- Light visible wax near the outer ear
- Mild dirt or debris after outdoor play
- No foul odor
- No redness
- No swelling
- No pain when the ear is touched
- No discharge
- Occasional moisture after bathing
- A small amount of residue after swimming
The word “visible” matters. Safe home cleaning focuses on what you can reach gently, not deep excavation. We are cleaning ears, not mining for treasure.
Signs of Infection That Need Veterinary Care
Skip home cleaning and call your veterinarian if you notice:
- Foul or sour odor
- Dark brown, black, yellow, or green discharge
- Blood or scabs
- Constant scratching
- Frequent head shaking
- Yelping when the ear is touched
- Redness or swelling
- Ear flap tenderness
- Head tilt
- Loss of balance
- Sudden hearing loss
- One ear looking much worse than the other
Ear infections can involve yeast, bacteria, mites, allergies, foreign material, or more than one problem at the same time. Treatment depends on the cause. That is why guessing at home can backfire.
Long-eared breeds, including Cocker Spaniels and Basset Hounds, are often discussed as higher-risk dogs because their ear shape can trap warmth and moisture. Dogs with allergies, heavy ear hair, frequent swimming habits, or recurring ear issues may also need closer monitoring.
What to Do if Pain, Odor, Discharge, or Hearing Loss Appears
If your dog shows pain, odor, discharge, or hearing changes during or after cleaning, stop immediately.
Here is the safest next step:
- Do not add more cleaner.
- Do not try alcohol, vinegar, peroxide, oils, or essential oils.
- Prevent scratching if possible, since scratching can worsen wounds.
- Call your veterinarian for an ear exam.
- Ask whether the eardrum needs to be checked before any cleaner or medication is used.
- Follow the treatment plan exactly, including rechecks if recommended.
A veterinary visit may include an otoscope exam and cytology, which means looking at ear material under a microscope. That helps identify yeast, bacteria, mites, or inflammatory cells so the right treatment can be used.
How to Clean Your Dog’s Ears Safely at Home
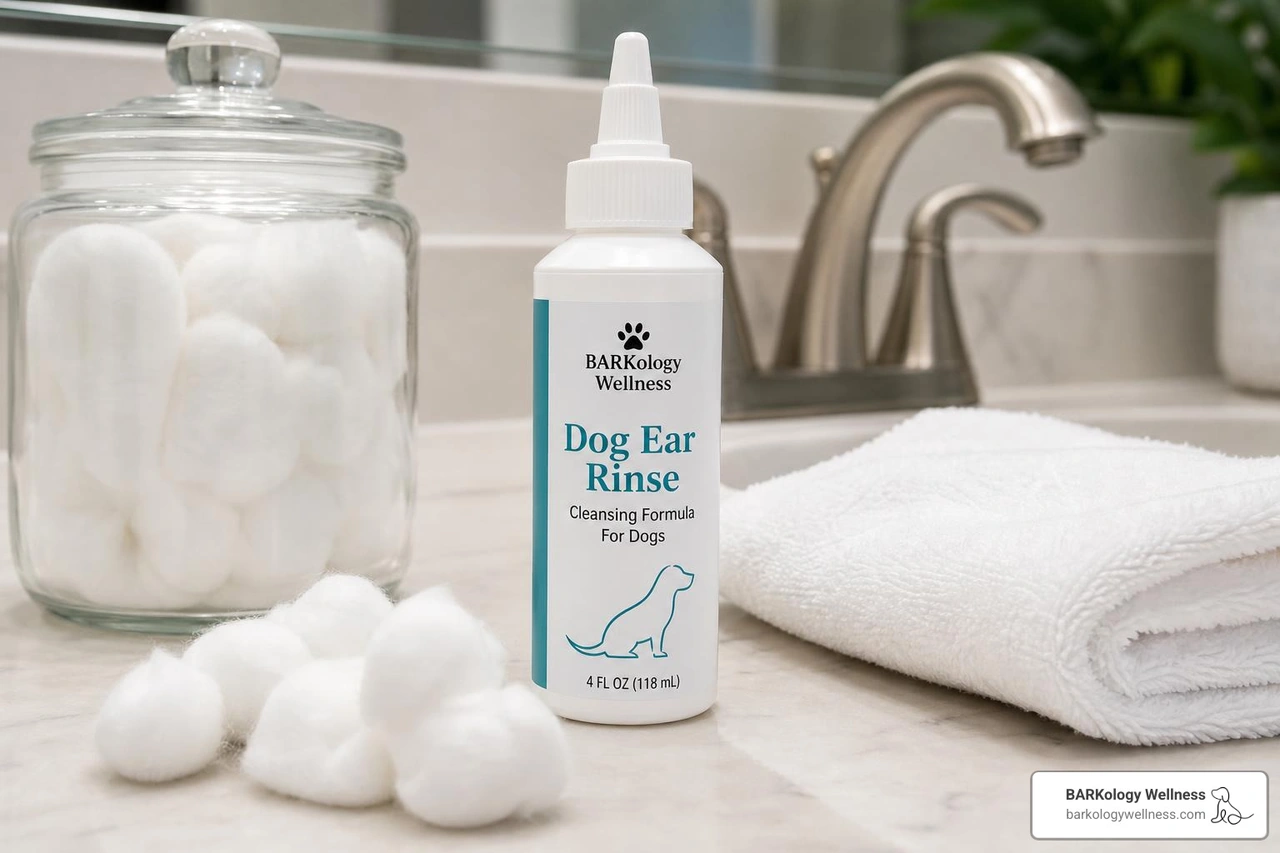
Dog ear canals are L-shaped, with a vertical and horizontal section. That shape helps protect the eardrum, but it also means wax and moisture can collect where you cannot see them. Safe cleaning uses liquid to loosen debris, massage to help bring it outward, and gentle wiping to remove what becomes visible.
For a deeper step-by-step overview, visit our guide to ear cleaning for dogs.
Step 1: Pick the Right Time and Supplies
Choose a calm moment. After a walk, before bedtime, or when your dog is already relaxed can work well. Trying to clean ears when your dog is zooming through the house like a furry tornado is not ideal.
Gather:
- Dog-formulated ear cleanser
- Cotton balls or soft gauze
- A towel
- Treats
- A non-slip surface
- A calm helper, if needed
Avoid forced restraint. If your dog is scared or defensive, slow down. Pair ear handling with treats over several short sessions before attempting a full cleaning.
Step 2: Apply Cleaner Without Jamming the Ear Canal
Lift the ear flap and hold the bottle above the opening of the ear canal. Do not shove the tip down into the ear. If the bottle tip touches the ear, wipe it clean before using it again.
Apply the dog-safe cleaner according to the label or your veterinarian’s instructions. Many liquid cleaners are designed to fill part of the canal so debris can loosen and move outward.
Important safety rules:
- Do not insert the bottle tip deeply.
- Do not use pressure.
- Do not use cold cleaner if your dog is sensitive.
- Do not clean if the ear looks infected unless your vet has instructed you to.
Step 3: Massage, Shake, and Wipe
Massage the base of the ear for about 30 seconds. You may hear a soft squishing sound. That usually means the cleaner is moving around and loosening wax.
Then let your dog shake. Yes, it may be messy. Yes, you may get ear cleaner on your shirt. This is why the towel exists.
After the head shake, use cotton or gauze to wipe the visible parts of the ear flap and outer canal. Clean only as far as your finger comfortably reaches with the cotton or gauze. Then dry the outer ear.
End with praise and treats. We want your dog thinking, “Fine, that was weird, but snacks happened.”
Step 4: Know When to Stop
Stop cleaning and call your vet if you see or notice:
- Pain
- Yelping
- Bleeding
- Redness that worsens
- Strong odor
- Heavy discharge
- Debris that keeps returning
- Head shaking that gets worse
- Sudden resistance from a dog who usually tolerates cleaning
Repeated cleaning can irritate the canal. If the ear is not improving, the answer is not “more scrubbing.” It is a better diagnosis.
Ingredients and Tools to Avoid in Dog Ear Cleaning
Not every product that sounds “cleansing” belongs in a dog’s ear. The ear canal is lined with sensitive skin, and it is easy to cause inflammation with the wrong ingredient or tool.
Avoid:
- Rubbing alcohol
- Alcohol wipes
- Hydrogen peroxide
- Undiluted vinegar
- Witch hazel
- Tea tree oil
- Essential oils
- Human ear products
- Human skin products
- Cotton swabs inserted into the canal
- Sharp tools
- High-pressure water flushing
Avoid Alcohol for Dogs Ears Unless Your Vet Specifically Directs It
For routine care, avoid alcohol for dogs ears. That includes rubbing alcohol, alcohol-based wipes, and homemade alcohol-vinegar mixtures.
Alcohol can sting raw tissue, dry the canal too aggressively, and worsen irritation. It is especially risky when you do not know whether the eardrum is intact. Even if your dog’s ear “just smells a little funny,” that odor may be infection, and alcohol can make the experience painful without solving the cause.
If your veterinarian prescribes or recommends a specific product containing an alcohol-type ingredient, follow their directions exactly. That is the exception, not the DIY rule.
Skip Cotton Swabs and Deep-Cleaning Tools
Cotton swabs are one of the most common ear-cleaning mistakes. They can:
- Push wax deeper
- Pack debris into the canal
- Scratch the lining
- Put pressure on the eardrum
- Make inflammation worse
Use cotton balls or gauze instead. The finger-depth rule is simple: only wipe where your finger can comfortably reach. If debris is deeper than that, your dog needs professional help, not a longer tool.
Be Careful With “Natural” Home Remedies
Natural does not always mean gentle. Poison ivy is natural. We do not recommend rubbing it on anyone’s ear.
Be cautious with:
- Vinegar: Can sting and irritate inflamed tissue, especially if undiluted.
- Hydrogen peroxide: Bubbling can irritate delicate skin and delay healing.
- Tea tree oil: Can be toxic to pets if used incorrectly.
- Oils: May trap debris or moisture and are not a substitute for infection treatment.
- Witch hazel: Often contains alcohol and can sting.
- Water flushing: Can leave moisture behind and worsen yeast-friendly conditions.
Puppies, seniors, allergy-prone dogs, and dogs with chronic ear disease can be even more sensitive. When in doubt, ask before applying anything.
Safer Non-Alcohol Alternatives and How Often to Use Them
Safer routine ear care usually means a dog-formulated, non-alcohol cleanser selected for your dog’s needs. Some products focus on wax removal. Others support a healthy ear pH or help dry the ear after moisture exposure without the harsh sting of rubbing alcohol.
There are also veterinary flushes that use ingredients such as boric acid and acetic acid. An official label for boric acid and acetic acid veterinary ear flush includes directions and cautions, including avoiding use when eardrum damage is suspected and contacting a veterinarian if irritation develops. Again, labels matter.
For product-selection guidance, see our guide to the best ear rinse for dogs.
| Option | Best For | Pros | Cautions |
|---|---|---|---|
| Rubbing alcohol | Not recommended for DIY dog ear care | Dries moisture | Stings, irritates, unsafe with possible eardrum damage |
| Alcohol-based veterinary cleanser | Specific cases under vet guidance | Can dry and clean when properly formulated | Must follow label and vet advice |
| Non-alcohol dog ear rinse | Routine cleaning | Gentler, better for sensitive ears | Still should not be used on painful or infected ears without guidance |
| Saline | Certain vet-directed situations | Mild and simple | Not a wax dissolver; may leave moisture if overused |
| Wax-dissolving dog cleaner | Visible wax buildup | Helps loosen debris | Choose dog-specific formulas |
| Hypochlorous-style products | Sensitive skin support in some cases | Often gentle | Use pet-labeled products and vet advice |
How Non-Alcohol Ear Cleaners Compare
Non-alcohol ear cleaners are generally better suited for routine maintenance because they are less likely to sting. Many dog-specific formulas are designed to:
- Loosen wax
- Remove light debris
- Support normal ear pH
- Reduce moisture after bathing
- Be gentler on sensitive skin
- Help maintain comfort between grooming visits
They are not all the same, though. A dog with allergies, chronic yeast, or recurring infections may need a specific veterinary product. A dog with occasional bath moisture may need a different routine entirely.
At BARKology Wellness, we care about comfort as much as cleanliness. A clean ear is not a success if the dog leaves feeling sore, scared, or stung.
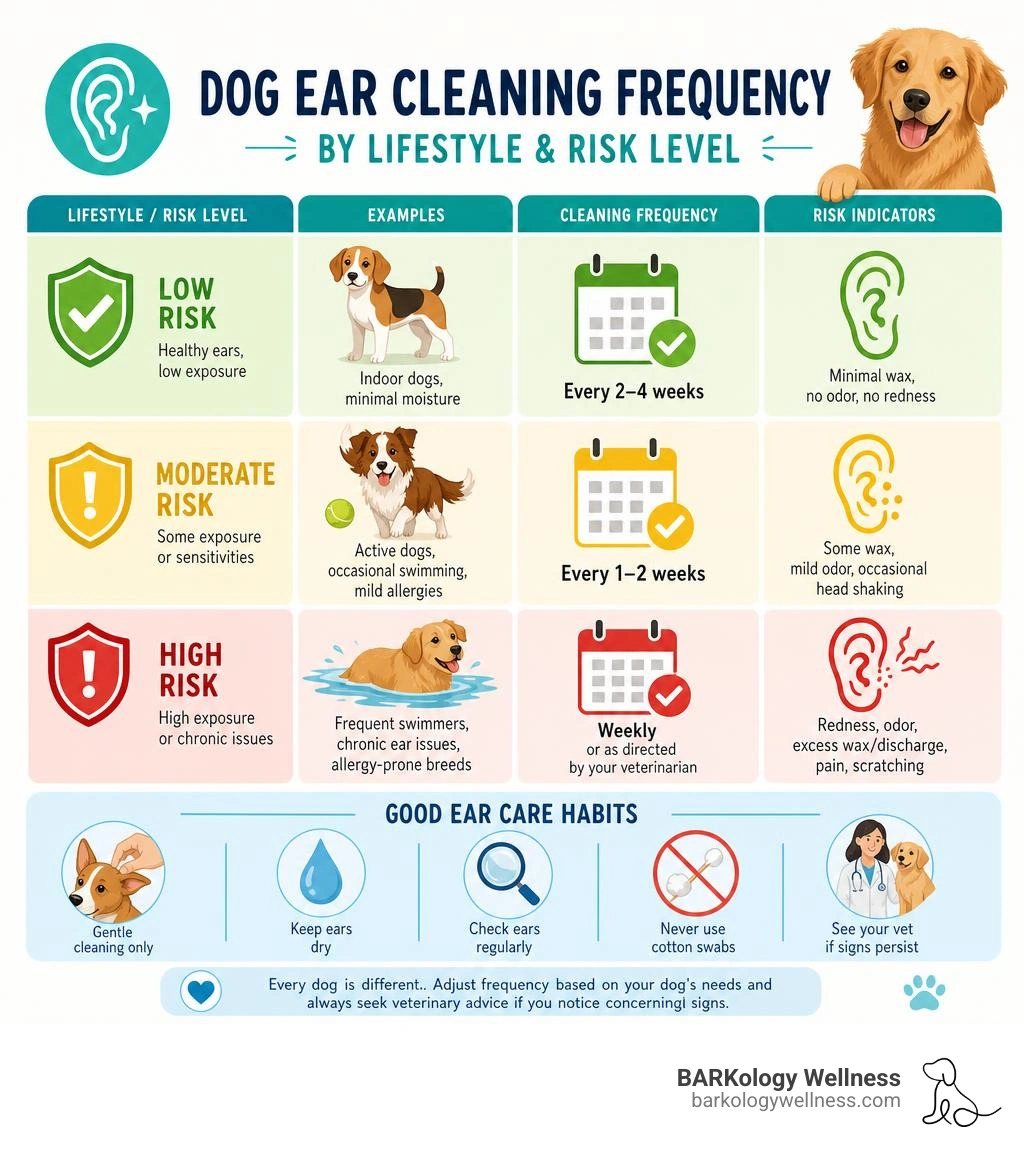
How Often Should You Clean a Dog’s Ears?
Most dogs do not need their ears cleaned on a rigid monthly schedule. Many only need periodic cleaning when wax or debris is visible.
Frequency depends on:
- Breed
- Ear shape
- Coat type
- Ear hair
- Allergy history
- Swimming habits
- Bathing schedule
- Past infections
- Wax production
Some dogs may only need cleaning occasionally. Dogs who swim, have floppy ears, have allergies, or develop wax quickly may need more frequent checks. Breeds often associated with ear maintenance needs include Cocker Spaniels, Basset Hounds, and Poodles, especially when ear hair or moisture is part of the picture.
A good rule: check ears weekly, clean only when needed, and ask your veterinarian what schedule fits your dog.
Puppies, Seniors, and Dogs Who Hate Ear Cleaning
Puppies have delicate ear canals and short attention spans. Seniors may have arthritis, neck pain, hearing loss, or old ear trauma that makes handling uncomfortable. Dogs who hate ear cleaning may not be “dramatic”; they may remember that it hurt before.
Try this gentler approach:
- Touch the ear, give a treat, stop.
- Lift the ear flap, give a treat, stop.
- Wipe the outer ear with dry gauze, give a treat, stop.
- Introduce the cleaner only after your dog is relaxed with handling.
- Keep sessions short.
- Never punish resistance.
- Ask for professional help if your dog panics or snaps.
Fear-free handling protects both your dog and you.
Frequently Asked Questions About Alcohol for Dogs Ears
Here are the quick answers we wish every pet parent had before reaching for the medicine cabinet.
Can I Put Rubbing Alcohol in My Dog’s Ear to Dry It Out?
No, not as a DIY routine.
Rubbing alcohol can cause intense stinging, especially if the ear is inflamed, scratched, infected, or raw. It can also be risky if the eardrum is damaged. If your dog’s ears need drying after swimming or bathing, ask your veterinarian or groomer about a dog-safe drying rinse instead.
If a vet specifically recommends a product that contains alcohol-type ingredients, use only that product as directed.
What If My Dog’s Ear Smells Bad After Cleaning?
A bad smell after cleaning is a red flag. It may mean yeast, bacteria, mites, trapped debris, allergies, or inflammation.
Do not keep cleaning to “get the smell out.” Odor is often a symptom, not a dirt problem. Stop using home products and schedule a veterinary exam. Masking odor delays care and may allow the infection to worsen.
Can a Dog Ear Infection Go Away Without a Vet?
Usually, no.
Dog ear infections need proper diagnosis and treatment. Without veterinary care, inflammation can become chronic, the canal can thicken, pain can increase, and hearing can be affected. Severe or untreated ear disease can cause permanent damage.
Cleaning may remove debris, but it does not replace prescription medication when infection is present.
Conclusion
Alcohol may belong in a first-aid kit, but it does not belong in your dog’s routine ear-cleaning plan.
The safest approach is simple: check ears regularly, clean only when needed, use a gentle dog-formulated cleanser, and stop immediately if you notice pain, odor, discharge, redness, or hearing changes. When something seems off, veterinary care is the right next step.
At BARKology Wellness in South Tampa, we blend science-minded wellness with calm, pampering grooming care. Our goal is not just a clean dog. It is a comfortable, happy dog who feels safe from nose to tail to those very important ears.
If your pup needs gentle grooming support, coat care, or help keeping bath-time moisture from becoming an ear problem, we would love to help. Schedule grooming support and let us treat your dog like royalty, minus the ear-stinging experiments.